

My 2009 traverse has 98,000 miles on it and I decided to do a deep valve cleaning. I have done the CRC spray before and have found it to have little effect. I had views the valves before and after using the CRC spray as directed and did not see any noticeable reduction in carbon on the valves. After this I realized it would take more mechanical means to remove the 98k miles worth of buildup. I had seen people use walnut shells to blast valves on other engines but I could not find much on cleaning the valves on this motor other than the CRC spray method. So I decided to purchase a media blaster from harbor freight and a box of walnut shells and give it a shot.
I removed the intake manifold and below are some of the before pictures:
![Image]()
![Image]()
At first I didn’t think it looked that bad but after looking closer I noticed the some of the valves had a thick layer of buildup and on some the had a thick ring around the edge of the port and others that had large globs of carbon on the stem.
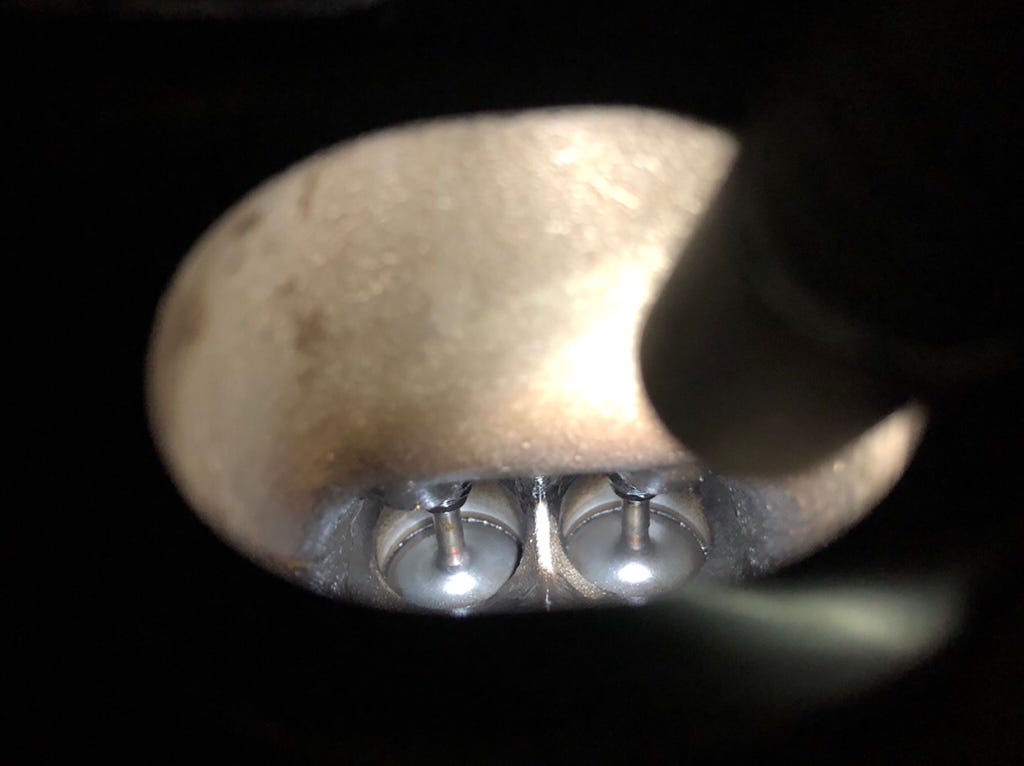
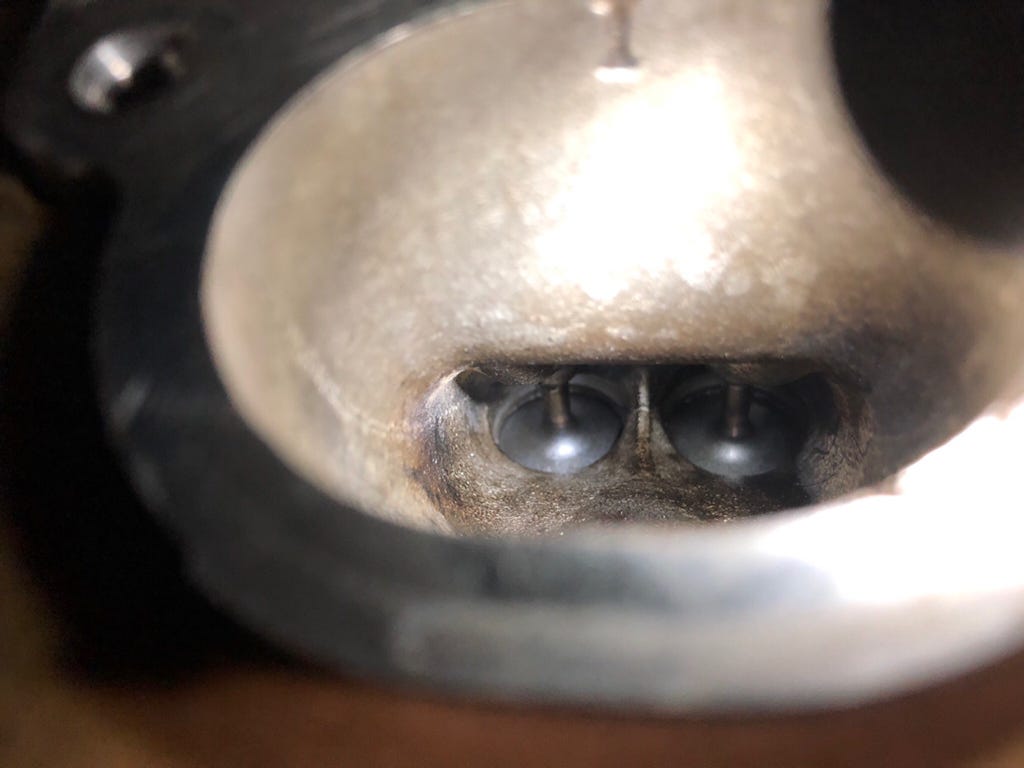
It took a lot of work to get the carbon off, the blasting itself would not do it all, I had to scrape and scrub the valves to finally get through. I would blast for a few minutes, spray CRC and let it soak then scrub with a brush and blast again. After about 6 hours I had all valves cleaned. The amount of work it took to get the carbon off I do not see any way that spraying valve cleaner in the intake alone could ever get the valves clean. Below are after photos:
![Image]()
![Image]()
Make sure to identify what cylinder has the valves open and tape that one off. Once the other 5 are clean, bump the starter to close the valves in that cylinder and clean that cylinder. Be sure to clean all cylinders out very well before rotating the engine so you do not suck in any wall it shells.
Once it was all done, I was very surprised at how much more power the car had. I truly did not expect that much improvement. It was certainly time well spent to do.
I removed the intake manifold and below are some of the before pictures:
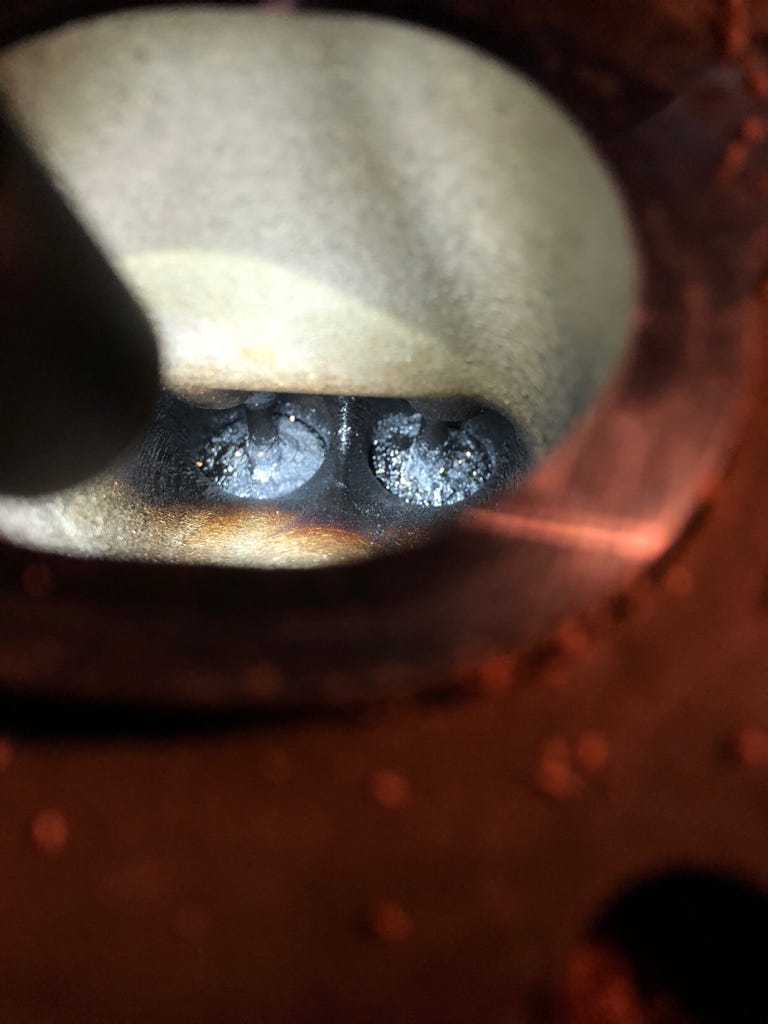

At first I didn’t think it looked that bad but after looking closer I noticed the some of the valves had a thick layer of buildup and on some the had a thick ring around the edge of the port and others that had large globs of carbon on the stem.
It took a lot of work to get the carbon off, the blasting itself would not do it all, I had to scrape and scrub the valves to finally get through. I would blast for a few minutes, spray CRC and let it soak then scrub with a brush and blast again. After about 6 hours I had all valves cleaned. The amount of work it took to get the carbon off I do not see any way that spraying valve cleaner in the intake alone could ever get the valves clean. Below are after photos:
Make sure to identify what cylinder has the valves open and tape that one off. Once the other 5 are clean, bump the starter to close the valves in that cylinder and clean that cylinder. Be sure to clean all cylinders out very well before rotating the engine so you do not suck in any wall it shells.
Once it was all done, I was very surprised at how much more power the car had. I truly did not expect that much improvement. It was certainly time well spent to do.


